Content:
To make this device, you must have the skills in handling metal. However, if you make such a hitch for a walk-behind tractor, it will help turn the time-consuming work of digging out potatoes into a much less tedious task. The article tells about several possible options for how a do-it-yourself potato digger can be made.
The principle of potato diggers
Almost the same simple principle is used to dig up potatoes. The ploughshare sinks into the ground and digs up roots mixed with stones (if any on the site) and earth.
In the process of movement, the mixture falls on the digger, which clears the soil and gradually moves it back until it falls to the ground. After that, it can be collected from the ground surface.
Potato digger
The following describes how the basic structures that make up a homemade potato digger can be made.
Some make a potato digger from a hiller with their own hands.
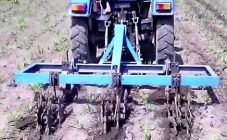
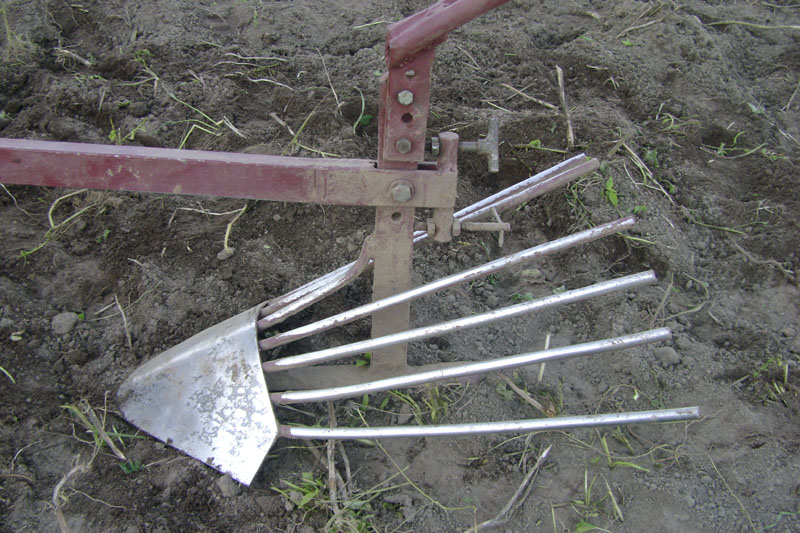
DIY fan potato digger
Here, several metal rods are attached to the share, which look back and up. When the dug potatoes hit them, they slowly move backward, freeing themselves from the earth, which wakes up. Dolphin belongs to this type.
When planning how to make a potato digger, it is necessary to take into account that tools will be required for its manufacture:
- Bulgarian;
- welding machine;
- drill and drills designed for metal work.
You will need the following materials:
- You will need sheet steel in order to make a ploughshare from it. The thickness is 3-4 mm.
- The bolts must be at least 12 mm in size.
- Square steel metal profile.
- Round steel bar or non-corrugated reinforcement. The thickness must be between 8 and 10 mm.
Drawings of a handmade potato digger, made by hand, imply that the manufacturing process consists of the following steps:
- The ploughshare must be cut from a sheet of steel.
- Two holes are drilled in it for attachment to the rack.
- Twigs half a meter long are welded to the back of the share so that they fan out.
- The rack is bolted to the share.
- A bracket with several drilled holes is attached to the top. It is designed to be attached to a walk-behind tractor.
- The lower part of the share can be reinforced with a metal strip for strength.
The device moves with a motor winch or walk-behind tractor. For example, the Neva or MTZ can be used for this purpose.
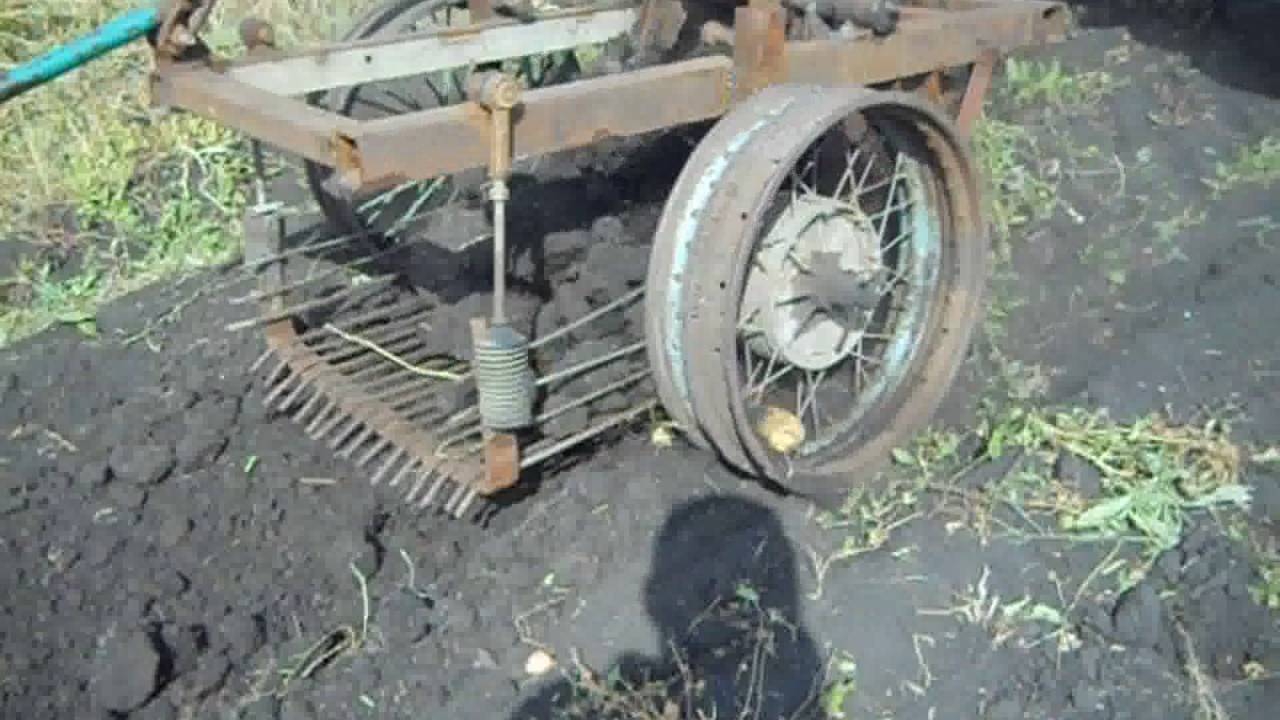
How to make your own roaring potato digger
Homemade potato digger
This type of potato digger is also called vibrating. Its principle of operation is as follows. Just like in other versions of potato diggers, a ploughshare is used here, with the help of which the potatoes are removed from the ground and gradually move backward during movement.Then the roots, mixed with the soil, fall on the grate, which constantly vibrates. In this case, the earth crumbles, and the potatoes move backward until they fall to the ground.
Manufacturing will require materials and tools:
- You will need a saw-grinder.
- To create reliable connections, you need a welding machine.
- When creating bolted connections, you will need to drill holes in the metal. This will require a drill and appropriate drill bits.
- It is customary to use a square metal profile to create a frame. It is necessary to prepare one with a cross section of 2.5 by 2.5 cm.
- Steel sheet, the thickness of which can be from three to five millimeters. It is used to make a share.
- A vibrating basket will need to be made of wire 8 mm thick, the relative strength of which will be sufficient.
- Wheels on which the potato digger will move.
- Bolts and other consumables.
The following is how to make a potato digger with your own hands:
- First, you need to cut the pieces of the metal profile so as to make up a rectangular metal frame.
- The wheel stands are welded. They are made from pieces of a metal profile that must be attached in a vertical position.
- The screening basket will be attached to special hinge holders. At this stage, they need to be welded to the frame.
- Now you need to install mechanisms that will create vibration using a reciprocating motion. The torque will be transmitted from the motor-block motor.
- A ploughshare is made of steel sheet. To do this, it is necessary not only to cut it out as needed, but also to bend it.
- Now is the time to attach the share to the structure. To do this, it is attached on special hinges to the screening basket and to the frame.
- Wheels are installed on the unit.
Various options can be selected when making a share
In most cases, the width of the working strip is approximately 40 cm.The knife is immersed in the soil to a depth of 25 cm.
Yield losses with this method of processing are negligible. In various situations, this value can be from 2 to 10%.
Before treating the site, it is recommended to completely clean it of potato tops and weeds so that they do not interfere with the collection of tubers.
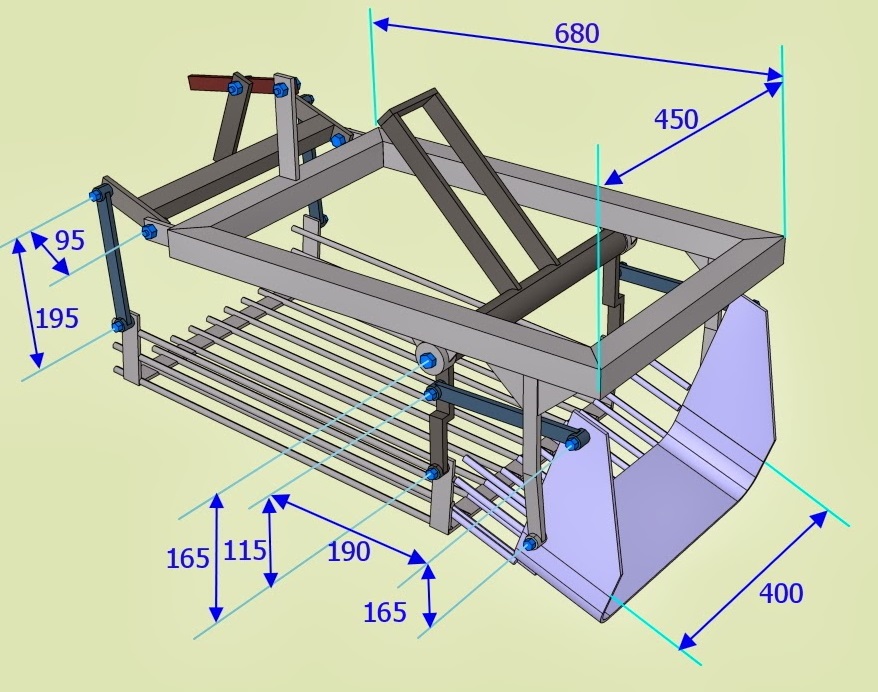
DIY potato digger
This type of device consists of a ploughshare and a belt conveyor. The ploughshare is lowered to a certain depth into the ground and in the process of movement raises the roots, mixed with clods of earth, upward. In the process of movement, this mixture gradually moves back and falls onto the conveyor. It moves in such a way that the potatoes move backwards and fall to the ground, from where they are collected in specially prepared containers.
As a ploughshare in such devices, several blades are used, which are located in the same plane. The usual depth of immersion of the share in the ground does not exceed 18 cm.
The process of creating a potato digger of this type includes the following steps:
- The base of the device is a metal frame. It is made from a square profile. To do this, you need to cut off pieces of the desired length and, using welding, make a rectangular structure using them.
- It is necessary to make a ploughshare.It is convenient to use sheet steel for this purpose.
- The rollers are attached to the frame, on which the conveyor belt will rotate.
- A tape is being assembled that will move the potatoes back.
- Mounts for mechanisms (gearboxes, gears) are installed.
- Now you need to install the conveyor belt.
- Wheels and plowshares are placed on the frame.
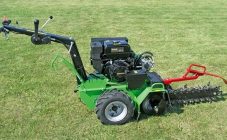
Do-it-yourself drum-type potato digger

Drum type potato digger
It works as follows. In its scheme, a ploughshare is provided; when the mechanical rotary walk-behind tractor moves forward, it cuts into the ground. Moreover, its depth exceeds that at which the potatoes should be. During the movement, the potatoes, mixed with the ground, gradually move backward and fall into the drum, the axis of which is horizontal, parallel to the line of movement.
The drum is turning. In this case, the earth wakes up between the twigs, and only root crops remain in the drum. Moving backwards, they fall to the ground. They can then be collected by hand from the surface of the ground into a suitable container. This device is in-line - it works by sequentially processing the beds one after another.
This kind of homemade potato digger is used on the T16.
The potato digger can greatly facilitate the work of the farmer. Its independent production is quite affordable, but it will require skills in working with metal.