Content:
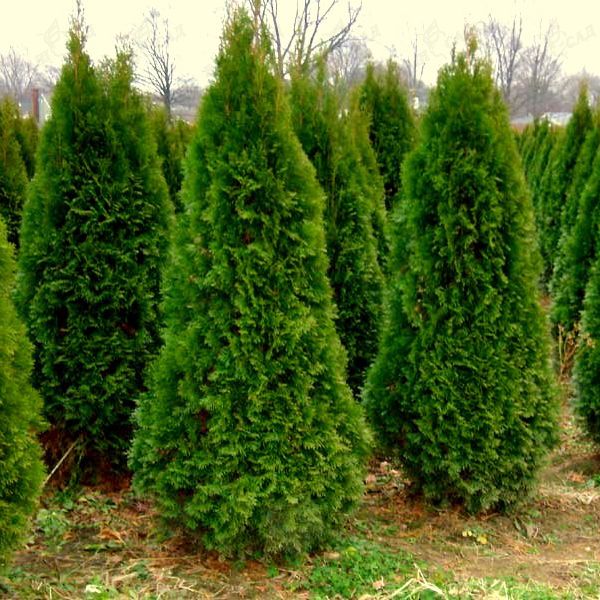
Thuja belongs to the unpretentious evergreens of the Cypress family. There are indoor species and those that grow outdoors and are widely used in garden decoration.
Growing thuja at home is possible from a cutting. This method has several advantages over seed-assisted cultivation. Thuja grown from a cutting retains varietal qualities, and the plant becomes full-fledged in the second or third year of life. The disadvantage is that 70-80% of the plants from all harvested cuttings survive.
Growing from cuttings
How to grow thuja from a twig at home? Thuja is unpretentious, and it suits both the warm climate and the conditions of the Urals and Siberia. Next, we will consider how the process of breeding a thuja with a handle occurs.
Choosing a season for planting a plant
Thuja can be propagated in autumn or spring. Both periods have their pros and cons.
Benefits of Autumn Breeding:
- the probability of obtaining healthy planting material is higher;
- the number of cuttings that die due to lack of moisture is lower, since the movement of the nutrient fluid slows down.

Thuja
The disadvantage is that it will take more time for rooting, since autumn is a dormant period.
The spring breeding season is mid-spring (March and April). The advantage of spring cuttings is that the shrubs begin to grow again and the cut shoots are best prepared for root formation and further growth. The disadvantage is the need for cuttings in a large amount of water due to active growth. For this reason, even a short-term lack of moisture endangers the appearance of the root.
Selection of planting material
Young twigs are selected as planting material. The plant from which branches should be cut should be no more than three years old. Cuttings must correspond to the following parameters: length - no more than half a meter, at the end have a piece of bark, diameter - 5-8 mm.
How to prepare a cutting
Autumn harvesting of cuttings occurs in mid-autumn - October. A cloudy day should be chosen for harvesting branches. Shoots are best plucked from the top of the plant. If the plant is tall, then the choice should be made in favor of branches that are 3-4 years old. It is worth choosing cuttings covered with wood, no more than half a meter long. The twig should be torn off the tree with a sharp movement so that a piece of bark remains at the end.
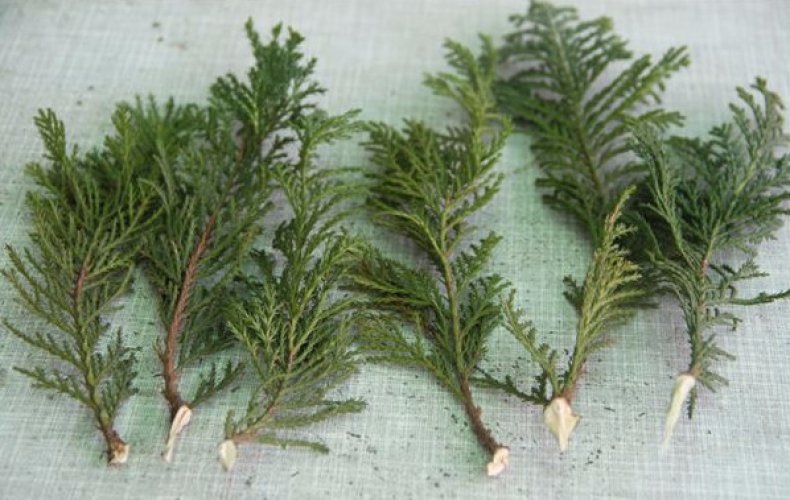
Thuja cuttings
Root formation in conifers is difficult; to facilitate this process, some rules should be followed.
Rules to follow after plucking a thuja twig:
- the base of the planting material is cut obliquely;
- the bark near the cut is removed;
- cuts are made along the shoot;
- the needles are removed throughout the shoot, except for the tip;
- the whole process is carried out within a short period of time so that the cutting does not have time to wilt.
How to root thuja with a handle
There are several ways to root thuja. They differ for the autumn and spring seasons.
In autumn, the following methods are preferred:
- in water;
- in the substrate;
- in the fabric.
Rooting cuttings in water is the simplest method.To do this, you need to pour water into the container and place the twigs there, so that the green part is above the surface of the liquid. Do not put more than three cuttings in the container. Planting material is placed in a cool place with natural light.
The next rooting method is with a substrate. Cuttings are placed in water for 12 hours. For them, containers with many holes for ventilation are being prepared. Drainage (expanded clay or gravel) is placed at the bottom. The soil is a mixture of peat, leafy soil and sand. The mixture is calcined and poured with a manganese solution. Next, you should fill the containers with the prepared substrate and make depressions about 15 millimeters. The twigs descend into the holes at an angle of 60 degrees. From above, the substrate is sprinkled with sand and compacted.
The rooting method in tissue is the most effective and easy to maintain. The risk of root rot is reduced. For this method, a plastic bag, moss (sphagnum), a piece of cloth, growth stimulants are taken.
The moss is soaked in boiled cool water for 2-3 hours. Soaked moss should be put in the middle of the fabric, cuttings are placed on top of it, observing the distance between them. The fabric is folded so that the green part does not stick out. The fabric is tied with a rope or elastic band. The package should be placed in a bag and hung in a well-lit place (by the window) at home.
In the spring, it is better to grow cuttings in the ground. To do this, you should place the branches in a solution with growth stimulants for a day. Place drainage and sand in containers with a large number of holes. The sand is soaked in boiling water, and then watered with a manganese solution. The cuttings must be planted in a cooled substrate to a depth of 15 millimeters. After planting, containers are placed in a greenhouse or greenhouse. Temperature regime suitable for seedlings: minimum 17 degrees, maximum - 23. Care for cuttings consists in daily spraying, in hot weather - watering twice a day.
After two months, roots will begin to appear.
Preparations for improving root formation
After cutting the cuttings and preparing them for further rooting, the shoots are placed in a solution of a root formation stimulator. In the jar with the drug, shoots are from 12 to 24 hours. To stimulate the appearance of roots, the drug Kornevin or Kornerost is used.
Rules for planting cuttings in open ground
Cuttings harvested both in autumn and spring need to be grown. Thuja should be grown in schools. This is the name of the special beds where the seedlings will grow for 2-3 years. Spring cuttings can be planted outside in September, and autumn cuttings only the next year.
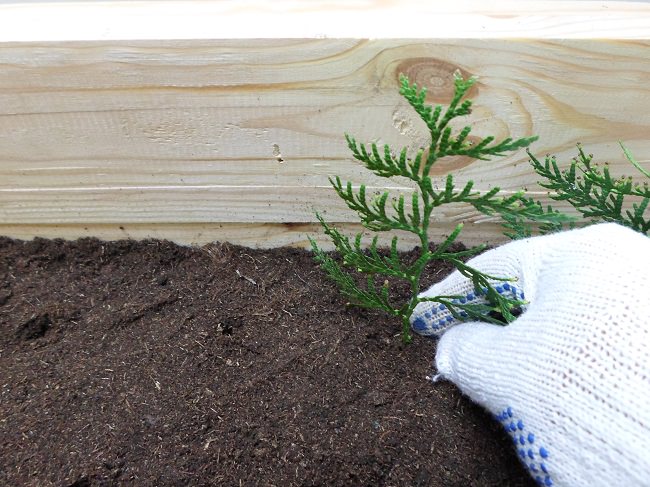
Planting a cutting
Thuja growing conditions in the open field:
- transplanting seedlings into schools:
- the area for the school is selected in partial shade;
- the soil is dug up, and peat is added to it;
- pots of cuttings are watered to ensure easy extraction;
- cuttings are planted in a school, the distance between seedlings is 25 centimeters;
- watering.
- after 2-3 years, transplant to a permanent place.
How to care for a young plant
A young tree requires watering every day, and also needs feeding. The first fertilizers are applied immediately after planting in a new place. Growth stimulants are used as top dressing, they are necessary for successful rooting and increase immunity. The soil under the seedling should be loosened regularly. Care includes weed removal and mulching. For the winter, young plants are covered with polyethylene, foliage is laid on the ground under the roots.In the spring, when it gets warmer, the shelter is removed.