Content:
This plant is widely used for landscape design. However, in most cases, a large number of seedlings are required. To get them, it is enough to propagate thuja by cuttings. How to propagate thuja, a quick and easy way to do this, is described in this article.
Description of culture
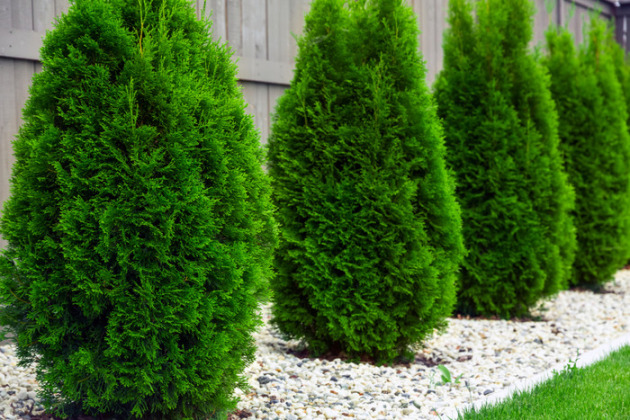
Thuja is a frost-resistant plant that does not require special care. Usually it is used for landscaping country houses.
This plant comes from East Asia. Its popularity at home is due to its luxurious dense crown, as well as unpretentiousness. Another advantage is the ease with which the crown can be trimmed to the desired shape. This plant is successfully used in various landscape compositions.
Thuja is often used to create living fences. In order to use it to create a landscape, a large number of plants may be required. How to propagate thuja is described in this article.
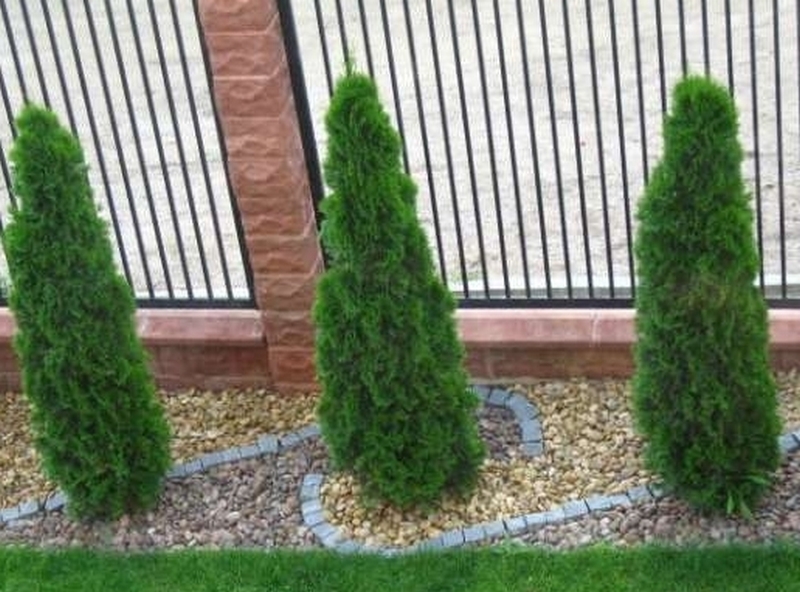
Thuja occidentalis in the landscape of the yard
Thuja is a beautiful but expensive plant, but you can grow it yourself.
Thuja can be propagated in one of two ways:
- seeds;
- use cuttings or small twigs for this.
In the latter case, you need to know how to plant thuja from a branch without roots.
If you grow a plant using the first way, then it will be a long and troublesome process. In total, this may take several years. In some cases, it can take six years to grow an adult plant from seed.
How to propagate thuja by cuttings
If you use cuttings for reproduction of thuja, then the complete preparation of the plant for planting in open ground will take no more than two and a half years. However, it is known that not all cuttings can sprout. The percentage of good cuttings, those that germinate, is 70-80%. If you deal with them in violation of the rules, then the success rate will be even less.
Selection of planting material
In order to propagate thuja by cuttings in the summer, you first need to correctly select the cuttings. Not all of them will sprout, so you need to prepare a few for planting.
When choosing for breeding, you can be guided by the following rules:
- The cuttings should look strong and healthy.
- If you can choose, you don't need to use branches that are too young or too old.
- The ones located in the middle of the tree are more likely to climb. In this case, the processes have already become strong enough, although they did not have time to stiffen.
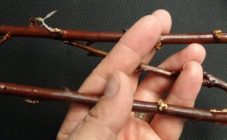
How to propagate by cuttings
When selecting for cuttings, you must use the branches growing in the middle of the plant. It is not recommended to cut them off. It is best to break it off so that a small amount of bark remains at the tip of the branch. Usually this piece is called the heel. The larger it is, the easier the rooting of thuja will take place. In order for a plucked branch to have a heel, it is enough to pluck the branch with a sharp downward movement.
In addition to using special soil, there are several more simple methods that can be used for rooting even by beginners. Here's how thuja reproduces at home:
- in the substrate;
- using water;
- using a diaper with moss.
Next, consider how thuja reproduces in each of these ways in more detail.
Using the substrate
For its application, it is necessary to prepare clean sand. It is disinfected before use. To do this, you can pour sand into a bucket and fill it with water. Then the bucket must be put on fire and brought to a boil. After this, the substrate must be watered with a weak solution of potassium permanganate.
Sometimes disinfection is carried out when the sand is in the growing tank. In this case, it is first poured with boiling water. Then washed with a weak solution of potassium permanganate.
Good watering gives results
With this method of cultivation, you need to carefully control the watering. It should not be too large, as this can lead to rotting of the branches. Also, it shouldn't be insufficient. This can cause cuttings to dry out and die.
Germination in water
Reproduction of thuja in a jar of water by cuttings is done as follows. To do this, pour 2 cm of water into a small container, place several branches there. Care consists in the fact that the water must be changed regularly, pre-disinfecting it with a weak solution of potassium permanganate. It is necessary to ensure that the leaves do not touch the water, because this can lead to rotting of the plant.
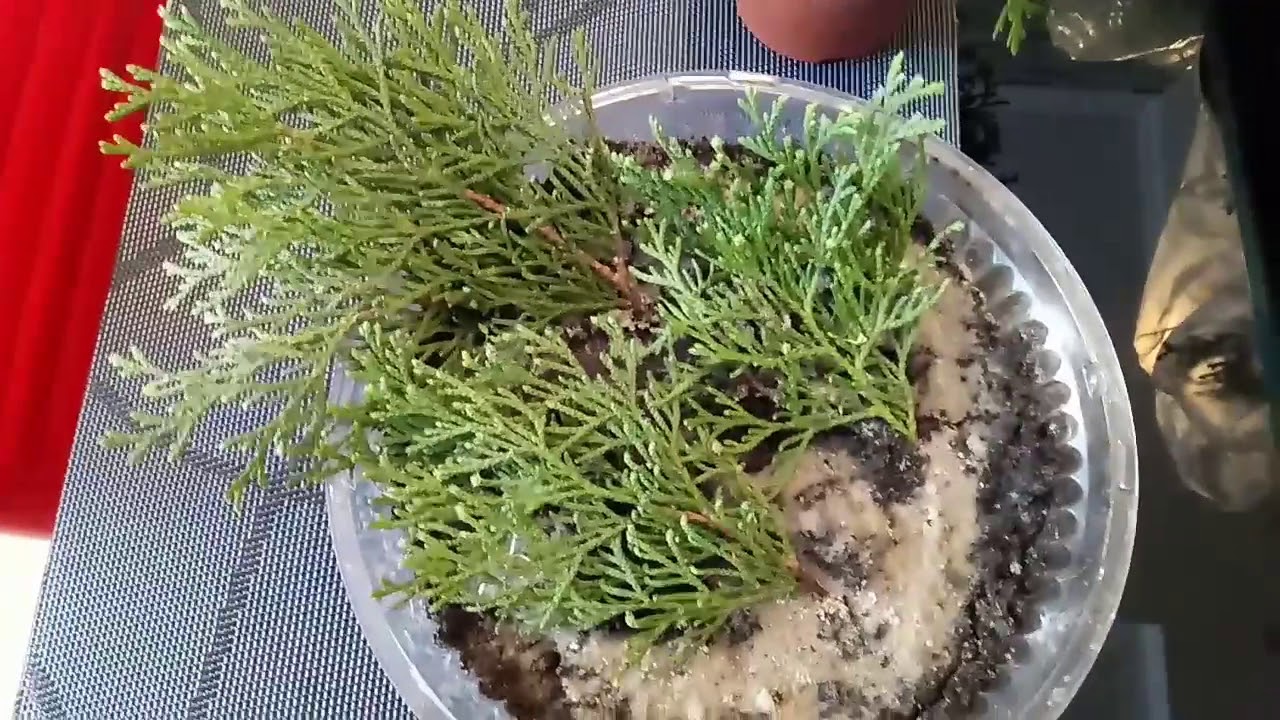
Use of sphagnum moss
You need to act according to the following method:
- For 12 hours, you need to place the sprouts in the mixture, which can be obtained by diluting water with Kornevin.
- Sphagnum is required to pour boiling water for 3 hours.
- Carefully lay out wet moss on the fabric, using only half of the fabric. The rest must be left free in order to then cover everything with it.
- Twigs are laid out on the moss, their heels must be immersed in a layer of sphagnum.
- It should be covered with a clean piece of fabric on top, while the green parts of the branches should come out.
- Roll the resulting tape into a roll, place it in a plastic bag and hang it in an illuminated place, but not in direct sunlight.
How to prepare a cutting
If there are leaves on a branch that should fall under the ground when planting, they must be cut off in advance.
It is necessary to disinfect the branches. To do this, their tip is dipped in a weak solution of potassium permanganate for a short time. In this case, it is enough to keep it in the solution for no more than a few minutes.
In addition, it is necessary to carry out treatment with some kind of growth stimulant. For this, the drug Kornevin is suitable. It is also permissible to use any other growth stimulant.
The second layer is a layer of sand or a mixture of it with garden soil. Cuttings are planted in it to a depth of two centimeters and the earth is slightly compacted around them with your fingers. You can use a special soil mixture in the top layer.
How to root thuja with cuttings
To do this, you must choose the right branches of this plant and germinate them in one of the known ways. After that, the sprouted cuttings are placed on a school bed, after two and a half years, the plant can be planted in open soil.
Description of the rooting process
When planting a cutting, a hole is prepared for it, the depth of which is 2 cm. It is believed that it is not necessary to plant it vertically. Typically the angle is about 60 degrees.
In order to root thuja, it is necessary to prepare a special soil. To do this, you need to collect some deciduous land. It is usually taken in the forest or park.This is the topmost layer that can be seen when old leaves and other debris are swept away from the surface. The soil in the pot should be a mixture of such soil and peat in a 1: 1 ratio.
After planting the cutting, it must be covered with earth. Put some sand on top and then press it with your fingers.
Rooting of thuja cuttings
The process must be carefully covered with a jar or special film on top. Before this, the plant must be watered. Then you need to put the pot in a bright and warm place. When growing, it is necessary to ensure that the humidity does not exceed 70%. The most suitable temperature for rooting is 17-23 degrees.
When growing, it is important to ensure that those leaves that are hanging down do not touch the ground. Otherwise, they will begin to collect excess moisture from the ground and may begin to rot.
When watering cuttings, it is preferable to do spraying. It must be done daily; if the weather is hot, then watering is required twice a day.
Despite this circumstance, it is too early to transplant thuja into open ground right now. Now it is necessary to gradually accustom the plant to fresh air. To do this, you need to open the greenhouse for a short time and let the thuja breathe fresh air. Gradually, this procedure needs to be carried out longer and longer. Sooner or later, the plant will be able to stand a sufficient time in cool air. When this happens, the time will come to plant the thuja on a special bed - a school.
For further preparation of cuttings for planting in open ground, you must do the following:
- You need to land them on a special bed (it is called a school). It should not be in the sun.
- There you need to add the right amount of peat. In this case, the norm is to use one bucket for every square meter.
- The soil here needs to be dug very carefully.
- Cuttings are planted in a school at a distance of 25 cm from each other.
- You need to moisten the soil.
What are the terms of thuja cuttings
It is recommended to germinate cuttings in late spring or summer. As an exception, you can start in June, but then the sprout will not actually start growing this season, but will wait until the next late spring.
Usually, the drug Kornevin is used for this purpose. Before rooting, the lower part of the cuttings is placed in a solution of this preparation for 12 hours. After that, they directly begin the growing process.
The procedure for growing a seedling that is completely ready for planting in open soil takes two and a half years. To do this, you must first germinate the cuttings, then plant them on a school garden bed, only after that you can plant thuja in a garden or park.