Content:
Summer residents know how tedious it is to manually plant a large area with tubers, while trying to maintain even rows. To help gardeners, industrialists have long begun to produce various equipment that facilitates the planting process. Although you can make any such device for planting potatoes with your own hands.
Overview of hand tools
Now, in fact, it will be easier to plant potatoes using original devices, and a shovel in this case is no longer needed. The tools that replace the spade not only make the process easier - thanks to them, the rows are perfectly even.
The plantation looks neat, it is more convenient to hilling bushes on it. Each of the proposed devices allows you to maintain the planting pattern, therefore, potatoes will actually be harvested in a mechanized way.
The device can be bought in a store or ordered online, but it is cheaper to make it yourself. No special material is required here - available means will do. The drawings of homemade tools are simple, so even a person without skills can make them.
Planting potatoes without a shovel
Markers
Who among summer residents has seen this device in action at least once is interested in how to make a marker for planting potatoes with their own hands. Craftsmen have invented several types of convenient devices. It is proposed to use metal pipes, wooden stakes or a solid board as a material.
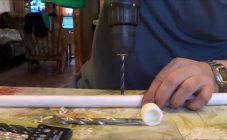
Simple model
It is not difficult to make an instrument - it is enough to take a stake with a diameter of 6-7 cm and a height of 0.9 m. To limit the depth of the hole for the tuber there will be a support from a rod, fixed horizontally at a height of 15 cm from the point.
Mittlider device
This model is a little more complicated than the previous one. The frame is made from a metal pipe with a diameter of 2.1 cm. A cone with a diameter of 5.5 or 6.5 cm is welded to it, which makes it possible to make indentations of the order of 25 cm.From the support leg to the marker 30 cm - this will be the distance between the holes.
3-hole device
With this tool, planting potatoes will go faster, since 3 markers are already attached to one frame. To make the device not heavy, it is recommended to use lightweight steel pipes for its manufacture (these are usually used in gas and water pipelines). For cones, aluminum and sturdy wood (oak, acacia) are suitable.
The given drawing (Fig. Below) will give a visual representation of the structure. All sizes are indicated on it.
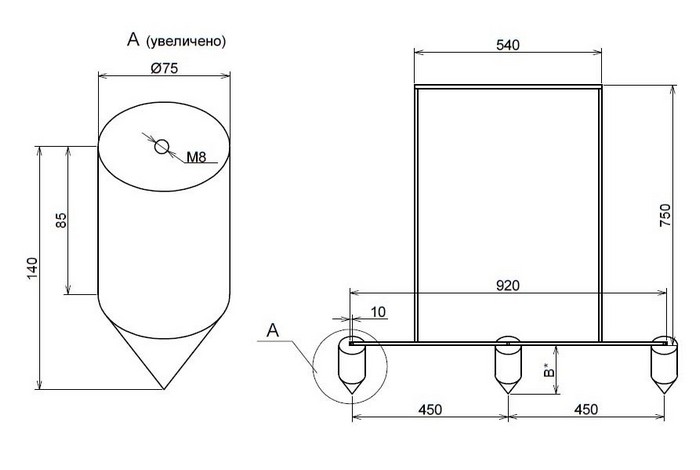
3 hole marker
To make a homemade tool reliable, you need to follow the given algorithm during manufacture:
- a long pipe is bent with the letter "P" and welded to the horizontal cross member;
- in the upper part of the cones, a thread is cut in the center;
- in the pipe on which the markers will be attached, through holes with a diameter of 9 mm are drilled in the center and along the edges;
- cones are attached to the frame with bolts;
- plugs are put on the ends of the pipe.
With the help of bolts, you can adjust the height of the markers, depending on the required depth of the holes.
Scriber
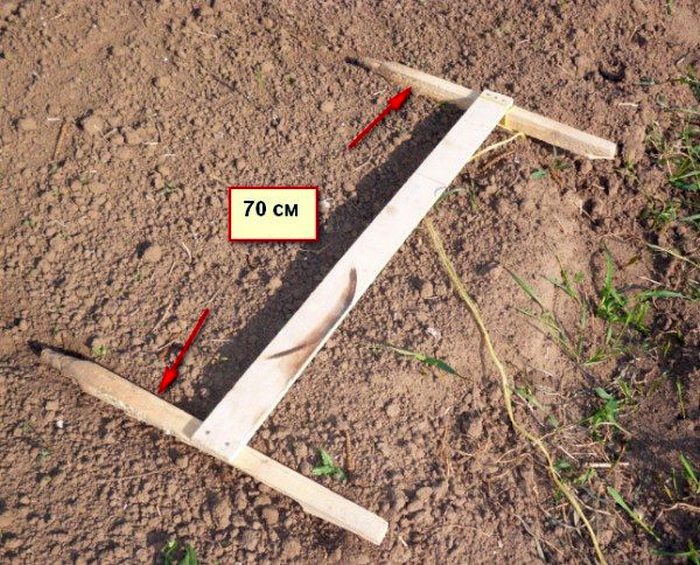
Perfectly even rows when planting potatoes will help you get a scribe. This is the most primitive device that can be easily made in an hour and a half. To create a structure, you will need 2 pointed wooden stakes, 10 cm in diameter and length for your height. For the convenience of working on the upper edges of the beams, it is worth placing handles.
The stakes are connected with crossbars made of strong boards 1.5 m long. The gap between the stakes should correspond to the distance between rows. If it means manual processing of a plot with planted potatoes, up to 50-55 cm is enough.When using a cultivator in caring for a plantation, the distance is increased to 0.60 m.If the work is carried out with a motto-tractor, then it is better to maintain the gap of about 0.75 m.
On the protruding part of the lower crossbar, a vertical rail is attached at the same distance from the stake - this will be the starting point. The lower horizontal bar itself should be located at a height of 10-15 cm from the tip of the stakes (under the depth of the pits).
A simplified version of the scribe
Planting plow
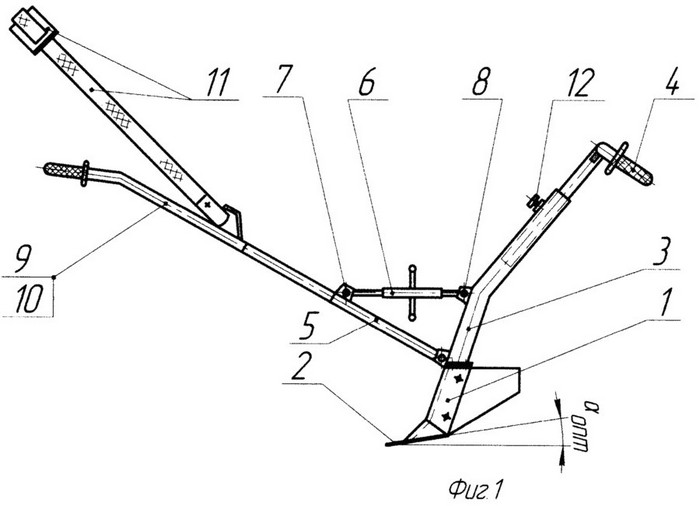
A hand plow will help to plant potatoes without a shovel. To make it with your own hands, you will have to make some effort. But they are worth spending, since the device turns out to be universal - the plow is used not only for planting potato beds, but also for the subsequent hilling of bushes and loosening the rows.
Since hollow pipes and sheet metal are used in the manufacture of the structure, you will need welding equipment, a gas burner or blowtorch, and a grinder.
To create a universal method of planting potatoes, follow the following algorithm:
- a meter-long pipe with a diameter of 2.5 cm is filled with sand and closed with plugs;
- bent at an angle of 10-15 degrees at a distance of 30 cm from the edge, using a blowtorch; get a rack, in the drawing indicated by the number 3;
- removing the plugs, pour out the sand (it is only needed for a neat bend of the pipe);
- a double-mold working element with a cutting knife is formed from pieces of metal and fixed from the bottom of the rack with bolts, for which holes are pre-drilled in the pipe;
- the control handle 4 is inserted into the pipe from above and fixed with the bolt 12; there should be several holes on the handle to make a telescopic retractable system;
- the front link 5 is shaped as indicated in the drawing and welded to the strut; positions 9, 10 indicate the presence of a horny handle;
- With brackets 7 and 8, a lanyard 6 is attached to the rod and the riser, which allows you to adjust the level of the knife attack.
Manual plow with pull
For ease of plow control, a strong neck-axillary tape can be attached at the base of the traction arms (position 11). It will allow the leading worker to evenly distribute his efforts when driving with the plow over the area.
How to use the fixtures
The devices described above facilitate and speed up the planting process, but you need to get used to using the tools. It is recommended that the work be done with a partner to keep things going.
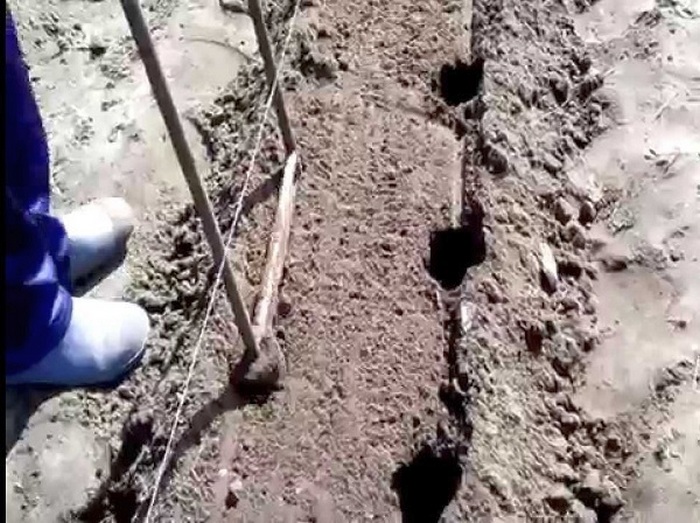
How to handle markers
It does not matter what type of this device will be used, the principle of operation is the same for them. To begin with, mark the first row with a twine and, parallel to it, make indentations in the ground with a marker, applying some effort to this. Moving along the twine, one worker forms holes, the next one - puts the sprouted tubers in them.
Using a 3-cone marker, the landing can be handled in a short time. The next rows are drawn up, focusing on the nearest planted. If the site is small, then the holes are marked in a checkerboard pattern for the convenience of subsequent processing.
Landing with a scribe
The design of this device is as simple as the actions of the farmer when using it. Even a large potato patch is easy to plant within a couple of hours by following these instructions:
- holding the tool with both hands, set a landmark (side rail) at the beginning of the section;
- press on the lower crossbar with your foot so that the stakes enter the soil to the desired depth;
- by moving the tool back and forth for a few seconds, expand the hole to the required size.
Having passed in this way along the site in one direction, 3 ridges of pits are obtained: 2 from the stakes and one more from the vertical rail. Turning in the opposite direction, the scribe is set as a reference point in the hole of the last ridge. While the sower fills the first 2 rows with potatoes, his partner continues to mark the ridges with a scribe, walking towards him.
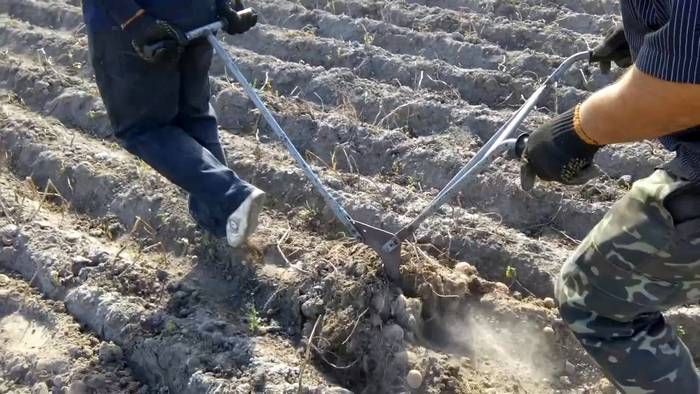
Landing under the plow
Despite the fact that the manufacture of this design will take some time, the planting of the tubers itself will be easier, compared to the situation when you would have to work with a shovel. True, in this version, a trench is formed, into which the potatoes are laid by a third person (two people control the plow).
It will be difficult to maintain a uniform distance, but the row will turn out to be even if you focus on the stretched twine. Before starting plowing, the tool must be set up:
- rotating the lanyard nut in one direction and the other, set the desired angle of attack of the knife;
- adjust the height of the control rack handle to fit your height with a bolt;
- the cervical-axillary belt is adjusted to the figure of the partner walking in front.
The pulling force in the process is provided by the actions of the person pulling the plow. It is on him that the belt is put on. Its main task is to keep the angle of attack constant. The person from behind, controlling the rack, pushes the device forward.
As a result, the knife easily cuts into the ground, the plows throw the soil to the sides, creating a neat trench for planting. If the wings are adjusted correctly, then the shifted ground will partially fill up the previous groove in which the tubers are already laid.
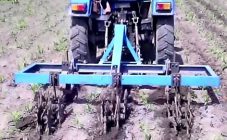
Site preparation for landing
The design of this device is so easy to use that it can be controlled by 2 people with different builds, differing in height. The use of the plow throughout the season will provide convenient cultivation of potatoes on a large plantation.
But even the simpler devices described above significantly increase the productivity of planting potato tubers, allowing planters to work smoothly.